-
General Rules
-
Setup
-
Battle Scenarios
-
The Turn
- Actions & Commands
- Restrictions
- Move Command
- Shoot Command
- Defend Command
- Run Command
- Advance Command
- Assault Command
- Ditch Command
- Overrun Command
- Covering Fire Command
- Intervene Command
- Rally Command
- Snap Fire Command
- Command Tokens
- Reacting to an Activation
- Command Override
- Spoils of War
- End Turn
- Inability to Command
- Turn Structure and Commands
- Show Remaining Articles (6) Collapse Articles
-
Movement
-
Shooting
-
Ranged Weapons
-
Damage & Rally
-
Cover
-
Defend and Ditch
-
Close Combat
-
Melee Weapon Types
-
Vehicles
- Vehicles
- Hull
- Facings
- Shield
- System Damage
- Minor Systems
- Major Systems
- Vehicle Hit Points
- Vehicle Field of Fire
- Halo
- (x) Face
- Turret
- Vehicle Actions
- Overcharge
- Overkill
- Ramming Speed
- Vehicles in Melee
- Vehicle Facing Special Rules
- Burst Barrier
- Secondary Shielding
- Shunt Field
- Vehicles in Cover
- Show Remaining Articles (7) Collapse Articles
-
Multiplayer
-
Special Rules
- Agile
- Armageddon
- Battering Ram
- Blood Craze
- Blood-drunk
- Bombard
- Borer
- Call of the Masters
- Cascade
- Caterpillar
- Cavalry
- Character (named unit)
- Cleave
- Convergence
- Corpse Eater
- Corrosive
- Corruption
- Crush
- Dart
- Dead Hard
- Death Strike
- Defensive
- Detonate
- Dismember
- Dispersion
- Doom
- Drag
- Drill
- Escort (unit name)
- Explosive
- Fissure
- Fizion
- Flying
- Fracture
- Frenzy
- Friendly Friendly Fire
- Guardian (unit name)
- Hidden in Chaos
- High Explosive
- Horde Rule
- Hyper-charge
- Immortal
- Imperfect Host
- Implode
- Inescapable
- Infiltrate
- Interlinked
- Marked
- Mechanized
- Mortar
- Overflow
- Phalanx
- Piercing
- Pike
- Prey on the Weak
- Ram
- Re-enforce
- Recon
- Relentless
- Rupture (named rule)
- Schism (Host)
- Shock
- Simmer
- Singularity
- Spawn
- Stalk
- Stealth
- Strider
- Survival (named rule)
- Swarm
- Toxic
- Trudging
- Ultrasonic
- Un-living Infection
- Unstable Platform
- Vulnerability Analysis
- Will of the Masters
- Wrath of the Masters
- Show Remaining Articles (63) Collapse Articles
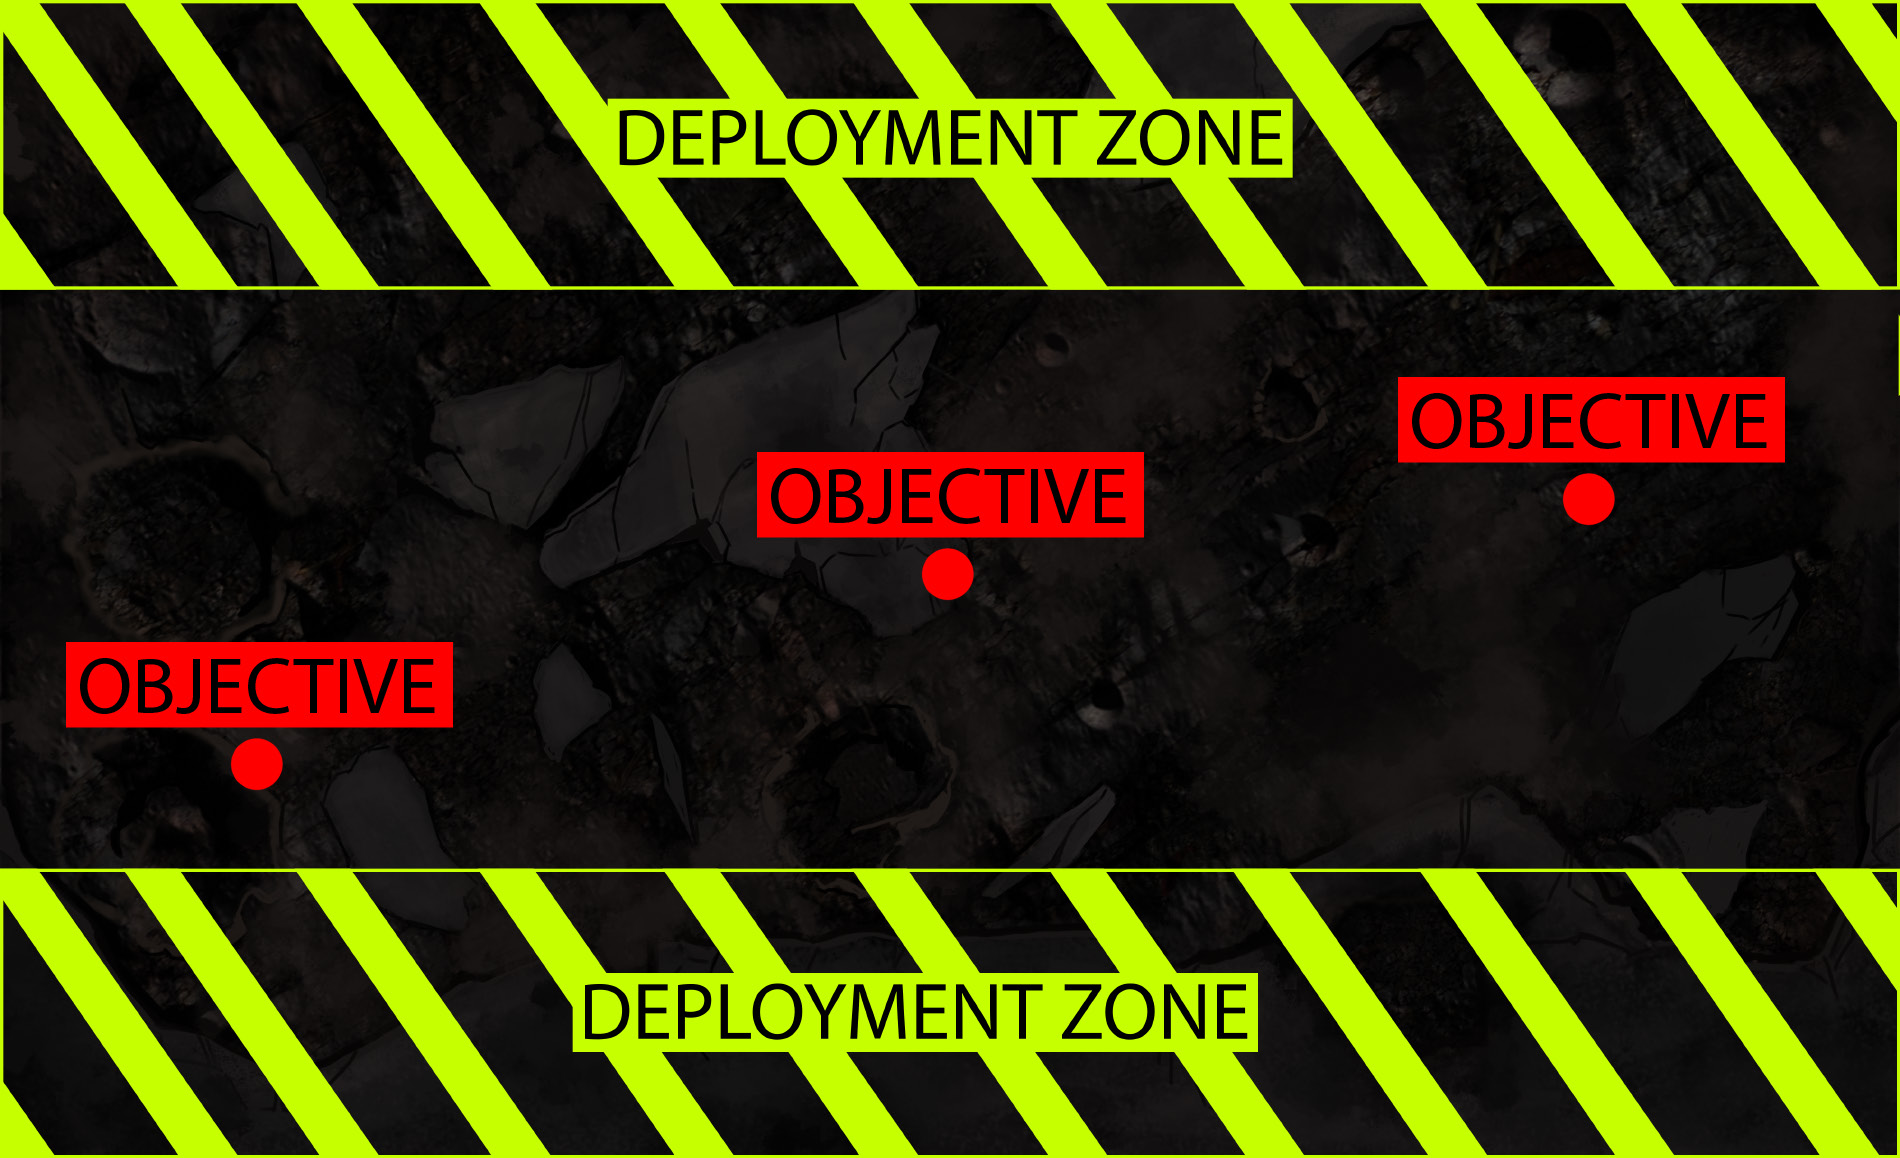
Scenario 3: All-out War
Table Setup
Begin by following the steps in the setup section. After rolling off to decide who goes first, place three tokens. Place the first in the center, the other two placed at least 12” away from each player’s table edge and 12” away from other tokens to represent objectives. Players should alternate placing these objectives.
Unit Setup
Battle Formations: The player that was chosen to go first places their units on the battlefield. Models must be placed within 2” of at least 1 other model from their unit, and all units must be placed over 2” from each other. Once they have placed all their units, the opposing player places theirs. All units must be placed wholly within 12” of the controlling player’s table edge.
Scout and Secure: At the beginning of every turn players spend threat points to deploy units. To deploy a uni,t discard threat points equal to the unit cost and place a single model from the unit onto your table edge. Your opponent cannot select this model as a target. Once its controlling player has moved it, they place all other models within 2”. The unit then continues as normal.
Special Rules
All-out War: At the end of the turn, players are refunded the threat points of any units they have lost, minus 1.
Objectives: At the end of every turn except turn one, any player with a model within 3” of an objective that has no enemy model within 2” gains a victory point.
Victory Conditions
Take and Hold: The first Player to gain 5 Victory Points wins the game.
scenario, all_out_war
